Trebuchet Construction
Here you'll find the formal writeup (if you want to call it that) for my trebuchet project. I hope the details and advice I give can help any prospective Trebuchet Makers out there to build a better siege engine. For now, enjoy the read, check out the links at the bottom for inspiration and more design tips, and have a look at my Full Trebuchet Photo Album on google's Picasaweb if you'd like to see the entire project as well as (soon) a short video of it firing. And you may as well head over to The Algorithmic Beauty of the Trebuchet sit and get the simulator, too
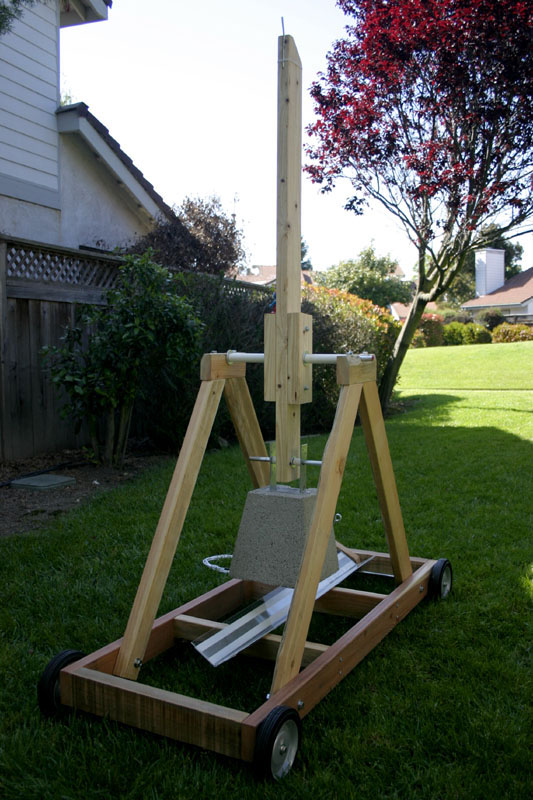
Vital Stats Measurements: L1 1.0 ft L2 2.9 ft L3 3.0 ft L4 0.7 ft L5 2.5 ft Mcw 60 lb Mpr 1.6 lb Mb 7.0 lb Cost: $140 Time: 8 hrs Range: 30 yards for 1 lb projectile |
|
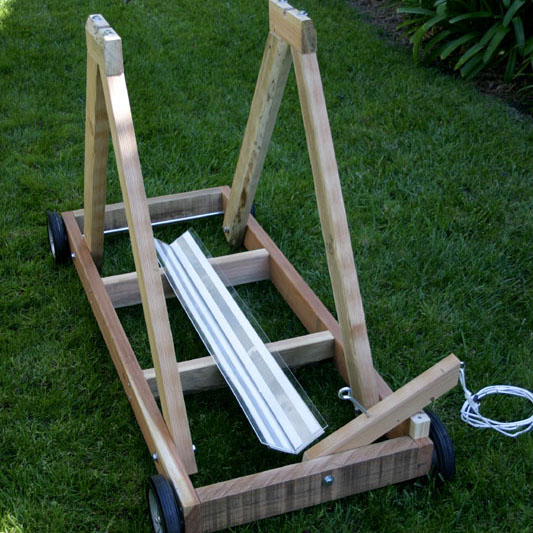
Other features include a main throwing arm made of a very light inside-cut of redwood (the stripe down one side is actually the inner core of the tree), a detachable sling which comes in handy more often than you'd think, easy assembly/disassembly in about 10 minutes and, it fits in the trunk of a mid-sized car so long as you can fold the back seats down. I've never been much of a wood-worker, so I'm sure this project can be done in much less than 8 hrs, and probably cheaper too, if you can scrounge up parts. Alas, I had to buy most of mine (for shame, I know...)
Frame Size and Counterweight
|
|
I know, I know, most of you probably have ideas like "I want to be able to fling Volkswagens across football fields" or the likes. Unfortunately, the first design constraint is to determine the size of your new siege machine. Hurling pianos is fun, but if you want to be able to carry your contraption in the trunk of your car, it simply won't happen. So first decide how big you're willing to make it. Table top? Trunk of car? Bed of truck? Trailer hitch? You can also design it to be easily disassembled and reassembled, but for larger trebs this can become quite cumbersome and you may be better off just building it into a trailer hitch or going with something more portable. A small, modular, trunk-totable treb can still fling a kilogram over 40 yds. To say nothing of water balloons... |
The size of your frame will determine roughly the size of your throwing arm and from there you can determine roughly what your counterweight will be. The general rule is to use as much weight as you can, but you are limited by the strength of the material you use for your throwing arm. Your arm should of course be strong, but the physics of the system require it to also be as light as possible in order to maintain efficiency. While I could have used 2 inch solid steel (which could then easily hold far more weight than the 100 lbs currently used) I'd be better off simply building a larger treb. It should be noted, though, that even with efficiency down, it would still throw farther with the heavier counterweight. It was a matter of personal preference to aim for efficiency rather than range. And besides, a 100 lb block of cement is enough weight to deal with for something designed to be "portable."
The basic lesson here is that a treb of a given size can only handle so much weight before it becomes inefficient and/or very difficult to design and build. Design your arm to be light (you can see the effects of this by varying the beam mass in the simulator and watching the differences both in efficiency and range). And if you can get your hands on a Titanium throwing arm, be sure and post some pics of it in action...
Projectile Weight
|
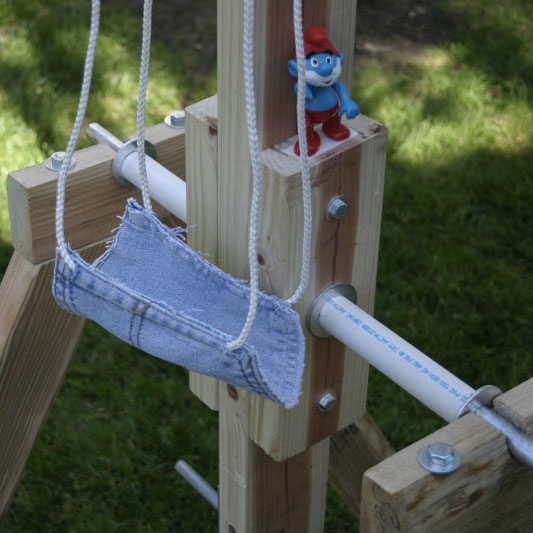
Now that you've got your size and your weight, you can calculate the mass of your projectile. Yes, unfortunately, you can't fire just anything. While projectile weight can vary, the treb is actually "tuned" to a certain weight and will be most efficient at that weight. This will be roughly 1/60 the mass of your CW. Papa Smurf is most efficient with a 1.6 lb projectile, but does alright with anything between 0.5 lb and 4 lb. Outside of that range, lighter projectiles will never throw beyond about 565 ft simply because of the weight of the throwing arm, and other real-world limitations. Likewise, heavier projectiles can be thrown, but I'd soon reach a point where the projectile would only go a few feet (important note: if you do go for heavier projectiles, be sure and adjust your sling pin angle to be much steeper or the sling will release too early and you'll end up firing backwards). |
|
Wheels and Hanging Arm
|
|
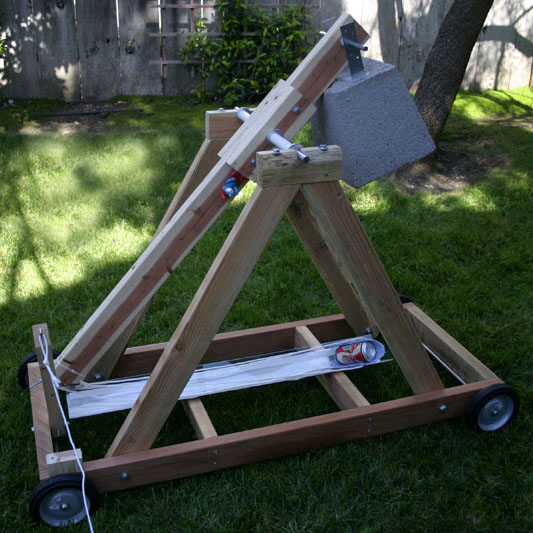
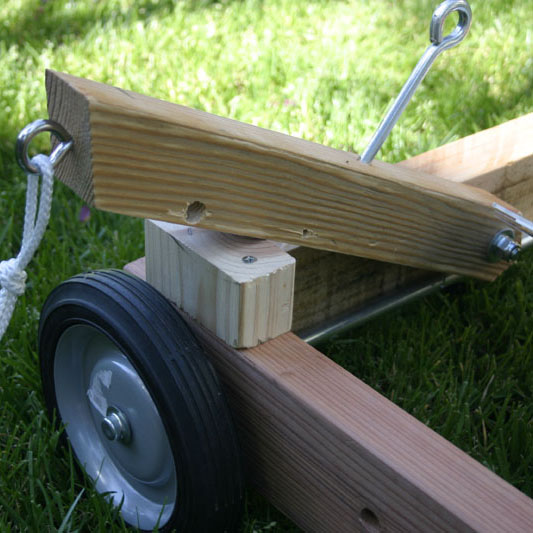
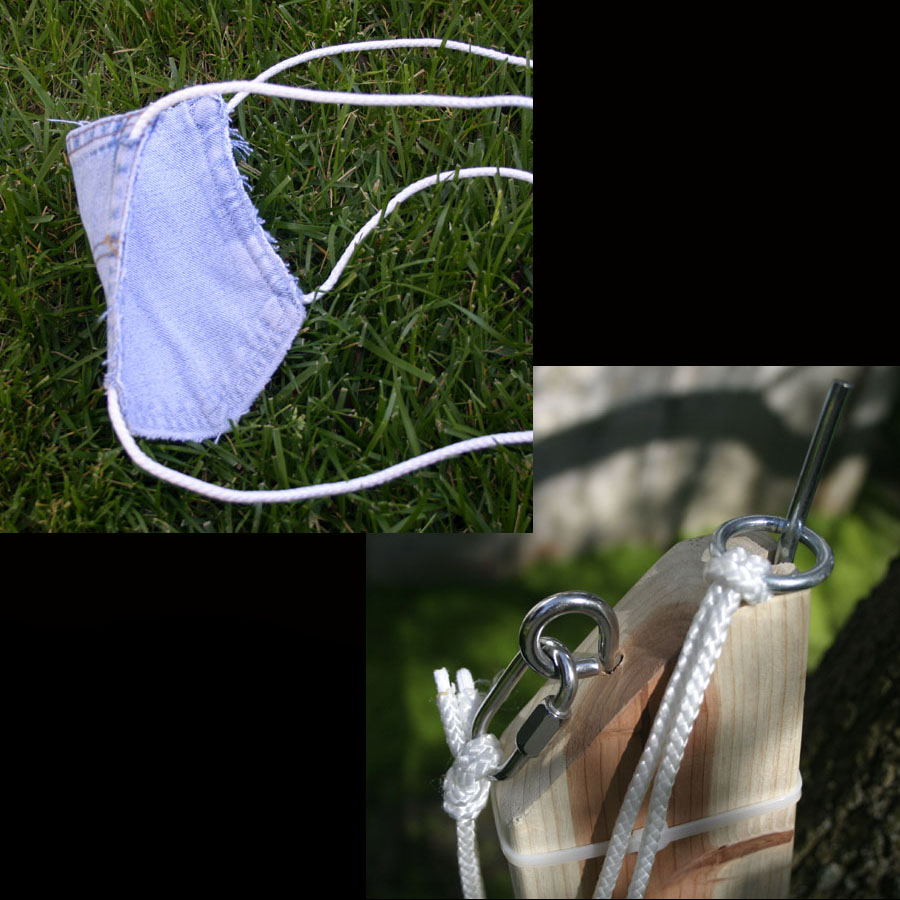
Now you have a few final design decisions to make: will you use a fixed counterweight or hanging counterweight, and will you use wheels or not? The physics of the system dictate that the ideal treb would have a counterweight which falls straight down (see the notes on the Floating Arm trebuchet for the explanation). This means you should use at least one of the two options: wheels or hanging arm. If wheels aren't an option for you, you will definitely want a hanging arm. If you choose neither, two things happen: first, you're less efficient (and therefore can't throw as far) and second, your treb will have the annoying habit of trying to tip itself over when it fires. Even if it doesn't fall over, your frame will get stressed and over time, nails/other hardware can work their way loose. Wheels should be low friction--easy to turn, fairly large, but relatively thin. The hanging arm should be as long as possible without the counterweight hitting your trough as it falls. Papa smurf actually uses both. Again, see the notes on the Floating Arm treb for details. |
Arm ratio, final calculations
|
Now comes the hardest part. If you're happy with the weight results so far, you can move on to calculating the arm lengths. Start with an arm ratio of about 3:1 and make the short end about 2/5 the frame height (L5). You have your general design: your frame size, your counterweight, and your frame design choices. Now just punch those numbers into the simulator and start playing the trial and error game. Good starting values are: L1 = 0.47*L5 L2 = 3*L1 L3 = L2 L4 = L5-L1 L5 = (this is one of your starting values, the frame height) Mcw (also one of your starting values) Mproj (about 1/60th Mcw) Mb (assume about 1.2 lbs/ft for a 2x4 wood beam) |
|
Tweak each value individually (except the ones you don't plan on changing-likely L5 and CW mass) and watch how efficiency and range change. After much trial and error with the simulator, I ended up with the lengths you see at the top of the page for Papa Smurf.
Frame
|
|
The frame is actually the simplest part to design in terms of calculations. It has to be sturdy. Weight doesn't matter that much, though don't go overboard or you'll begin to negate the effect of your wheels, if you're using wheels. The frame needs to be very stable in the front/back direction as this is the direction the treb will want to kick. Also, don't make it too skinny-your counterweight needs to be able to swing underneath. |
Sling, Release Pin, Trough
|
You may have learned in physics class that you get maximum range on a free falling projectile when it's fired at a 45 degree angle from the ground. For trebuchets, unlearn that idea: it's only true with an instantaneous acceleration such as a gun shot or striking an object with a hammer. With a treb, the force is applied gradually throughout the entire throw, and it is not constant over that time period, either. Usually, it pays to release at a later time, past 45 degrees. If you release at 45, the treb may not be done giving the projectile energy. You can use the simulator to show you the optimum release point. If the sling is parallel to the throwing arm, you'll want a pin nearer to 90 degrees. If the release point is shown to be earlier in the motion of the sling (as is the case with lighter projectiles), you'll want a pin angle nearer to 0 degrees. A good rule of thumb is that at your optimum projectile weight, you'll want about a 20 degree pin angle. For heavier objects, you'll want a steeper angle, and for lighter ones, somewhere around 10 or even 0. |
|
The trough is simply there to have something for the sling to slide along. You can turn it to adjust your left-right aim if you like. Try to make it low friction as your projectile will be sliding along this. Papa Smurf uses a bent sheet of Aluminum with plastic attached to it via two-sided tape.
The sling needs to be pouch-like to hold the projectile. The sling length is almost always most efficient when it is equal to the long-arm length. You should use a metal ring on the free end rather than just a loop of rope-this will wear less and be more consistent. Use strong rope-to sling a 5 lb projectile requires far more than 5 lb of force on the rope. For odd shaped projectiles, you do have the option of simply tying a string to the projectile, looping the other end over the firing pin, and just launching the whole construct with the "sling" attached.
Floating Arm Treb
The trebuchet is most efficient when the counterweight can move in a path straight down. A weight hanging on a pendulum (such as a fixed CW treb) obviously swings in an arc (you can simulate this by setting L4 = 0.01 -- notice how much efficiency is lost and how much shorter the throw is). This is why we add the hanging arm. Much less energy is put into moving the counterweight from side to side and therefore, much more can be given to the projectile (which is where we want it). A simple rule of thumb is that if your counterweight is moving after the projectile leaves the sling, you're wasting energy.
The hanging arm as well as wheels both give the treb a way to let the counterweight fall more or less straight down. However, the most efficient trebuchet would have a weight that falls perfectly straight down. Enter the so-called "floating arm" trebuchet. The FAT is effectively the same as a wheeled trebuchet (note the arm even has wheels on it to enable it to "float"). When you compare the motion of the counterweight relative to the ground between the two models, you can see it's pretty much the same path of motion. The wheeled trebuchet is essentially a floating arm trebuchet with the frame tied to the arm as it floats--a sort of "floating trebuchet" trebuchet. That doesn't mean the FAT is without merit--in terms of momentum, it's much easier to float an arm than it is to float the entire structure. So unless your frame weighs nothing, the FAT is still more efficient than the wheeled treb (though it can be argued that the friction of the slot guides for the counterweight reduce that efficiency to a point where it may not be worth the design trouble).
Materials
After much research, I just ended up using wood. as a rule of thumb, the same size piece of aluminum is roughly 3x stronger and 3x heavier than wood, and the same size piece of steel is 3x that of aluminum. In other words, you can use wood, aluminum, or steel, and for the same weight you get about the same strength. Wood is easy to work with and cheap. Another option is steel reinforced wood. And then there's always the titanium option.
Safety
Never stand behind or in front of the trebuchet. Misfires can easily send projectiles backwards (remember to use the proper pin angles, especially for heavier projectiles). Non misfires can easily send projectiles forwards. Don't stand under the counter weight-cement blocks on peoples' heads are only funny in cartoons. Don't begin a siege later than October-your enemy will simply let the winter freeze you out. Avoid archers.
References
The Wikipedia entry on Trebuchet
The perfect place to start
The Algorithmic Beauty of the Trebuchet
An excellent treatise on the math behind the magic. In particular, get the pdf doc
Tom Bullock's Trebuchets
Good look at one enthusiast's method.
Ripcord's Trebuchets
Excellent, very clear plans for a table top build it yourself design--this is for those with more patience who don't want to just buy a model with parts already cut.
The Finnish Trebuchet
The Finnish treb. Monstrous device. Lots of pics, some good, real-world tips.
The Official Punkin' Chunkin' Event website
The official Punkin' Chunkin' homepage. Unfortunately, most pictures are of air guns and not trebs. Still, good for inspiration.
Yuriy's Trebuchet
Yuriy's treb. Another enthusiast's method, including a couple good, real-world tips
Grey Company's Trebuchets
Grey Company's site. Lots of info, pictures.
Nick Berndsen's Trebuchet
An interesting spring-powered catapult. Very clean design.
trebuchet.com
More of a commercial oriented site, but still some useful stuff.
Fun Ideas
Two Words: Trebuchet Golf
2007 Tom Sciortino